 Manufacture of my jacket toile.
1. First I had to begin by patterning my jacket, I started off with the basic body block and traced off both the front and back, ensuring that I traced off all my markings.
2. I then cut my bodice pattern out, I then had to adapt it to move the darts that I didn't need as I wanted my jacket to be quite boxy.
 |
| Moving the darts. |

3. I then got the sleeve block and traced around it, I then had to adapt the sleeve to make it smaller to the size that I wanted. I did this by using the slash and spread method. I cut up my sleeve pattern 5 times and I then pulled them in to reduce the width, when I got the sleeve to a size that I liked I was then able to tape it down onto pattern paper and trace it off.
4. Once I had both my basic patterns I then had to concentrate on my back panel piece for my jacket, I did this by having to draw the panel onto my back pattern piece to the size that I wanted. I then broke the pattern into 3 different pieces, I had the back of my jacket, the back panel and the waist panel. I did this so that I knew which bit went where when manufacturing the garment.
5. Once I had my panel I was then able to trace each one off, I added a 1cm seam allowance to each side except the side that would be cut on the fold, I was then able to cut these out ready for toiling.
Manufacturing
 1. I lay all of my pattern pieces onto my calico fabric which I had folded length ways, ensuring that anything that was needed to be cut on the fold was, Once I knew all of my patterns were correct I was then able to pin them all down and cut around each one.
2. Once I had all of my pieces cut out I was then able to start manufacturing my toile. I started off by marking off my darts on my 2 front pieces, once they were marked in place I was then able to sew my darts up.
3. When I had sewn up my darts I then had to sew my 2 front pieces onto my back piece, I did this by placing the right sides of the fabric together and pinning down the edge, I then sewed down the edge using a 1cm seam allowance, I did the same with my other front piece.
4. Once my front and back pieces were together I was then able to sew the shoulders of my jacket together, I pinned them right side to right side I then sewed across again using a 1cm seam allowance.
5. After I had put the majority of my jacket together I was then able to put my panel pieces in, I started off by putting the waist panel in I did this by placing the right sides of my fabric together, I then pinned it on, I was then able to sew down both edges 1cm.
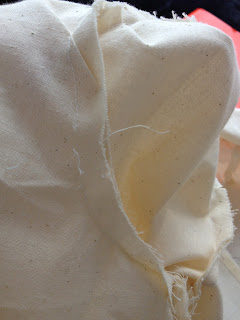
6. After my waist panel was in I was a bit unsure of how my back panel was going to work so I decided to leave that until last, so I decided to put my sleeves in, I did this by pinning my sleeve around the edge of the armhole of the jacket trying to ease it in to fit the shape. Once I had pinned the sleeve in place I was then able to sew along the edge 1cm, I then repeated this process for my other sleeve, I then had to place the right sides of my sleeve together and sewed down to join my sleeve together, I then did this again on my other sleeve.
 |
| Arm hole and sleeve. |
 |
| Sleeve. |
7. When my sleeves were sewn into place I realised that the top of my sleeve had slightly rucked up so that I may have to reduce the width of the top of my sleeve on my pattern piece in order for it to fit better.
 |
| Back panel piece. |
8. The last thing that I had left to do was sew my back panel piece in, I struggled with this slightly as it was sewing at a right angle, I had to place it right side to right side, I then had to pin along each of the edges, Once they were all pinned in place I was then able to sew them together I had to sew down 1cm then across 1cm creating a right angle. As I will be using lace to create my back panel I may have to add a seam to my back jacket piece to make the sewing more simple.
 |
| Front of jacket. |


No comments:
Post a Comment
Thank you for viewing my blog, i will be sure to get back to you a.s.a.p x